snap-analytics-logo

Advanced Features of Microsoft Bookings

With flexible working being the norm in most enterprises, the ability to allocate work spaces efficiently has become a business critical process. This article covers three advanced features of Microsoft Bookings (part of Office 365) which will help you to make the best use of the desks you have available for your staff.

  • Use Microsoft Bookings as an office desk booking system
  • Advanced feature #1: Embed your Bookings page into a website
  • Advanced featute #2: Extract Bookings data for Analytics

Use Microsoft Bookings as an Office Desk Booking System

With hybrid working being offered by many companies to their workforce, offices with permanent desk allocation are becoming less common. Instead, more companies are choosing to provide hot desks to allow staff to use desks on a flexible basis whenever they come to the office. To facilitate this process, a desk booking system is recommended so that desks can be booked ahead of time and tussles over who uses what desk can be avoided. Although MS Bookings is intended for booking appointments or meetings with people, it can be also used as a handy desk (and meeting room) booking system instead if set up correctly. The steps to configure this can be found in this existing blog.

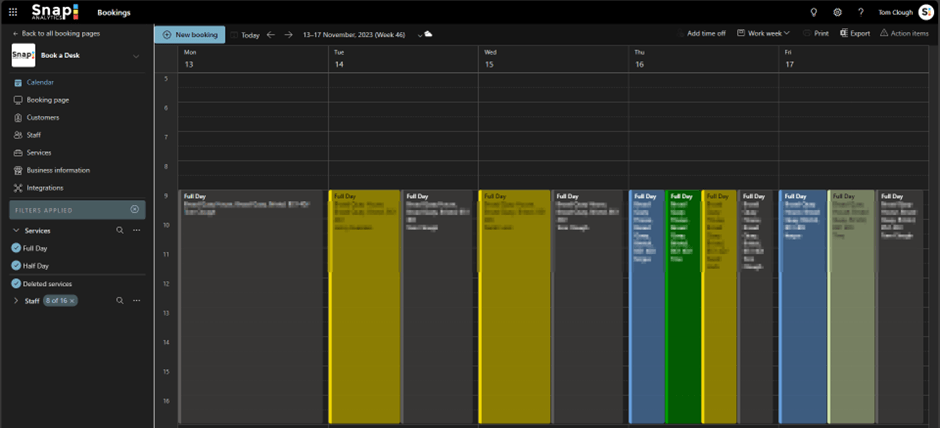
At Snap Analytics, MS Bookings is used as our hot desk booking system. Overall it works very well, although there are some minor limitations which hopefully will be resolved in due time by Microsoft: It is not yet possible to book multiple days in one go. Neither does the booking page automatically populate the ‘name’ and ‘email address’ fields, even though it requires you to log in with a Microsoft account. If you can live with these quirks, then this tool should suit your needs.

Advanced feature #1: Embed your Bookings Page into a Website

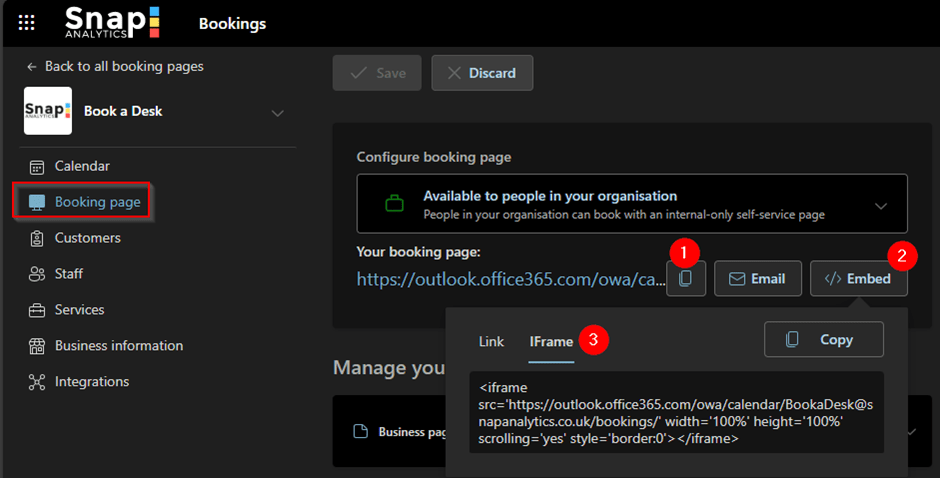
Each Bookings system comes with its own booking page, the link (1 below) to which can be found in the ‘Booking page’ area in the navigation bar which you can share with the users of your Bookings system. However, if you have a website where customers look to book appointments or a site used by staff for internal resources (e.g. SharePoint), embedding your booking page into that site can reduce the number of clicks required for customers or staff to create a booking. The Link or IFrame code for embedding can be found in the ‘Booking page’ area in the navigation bar (2 & 3 below).

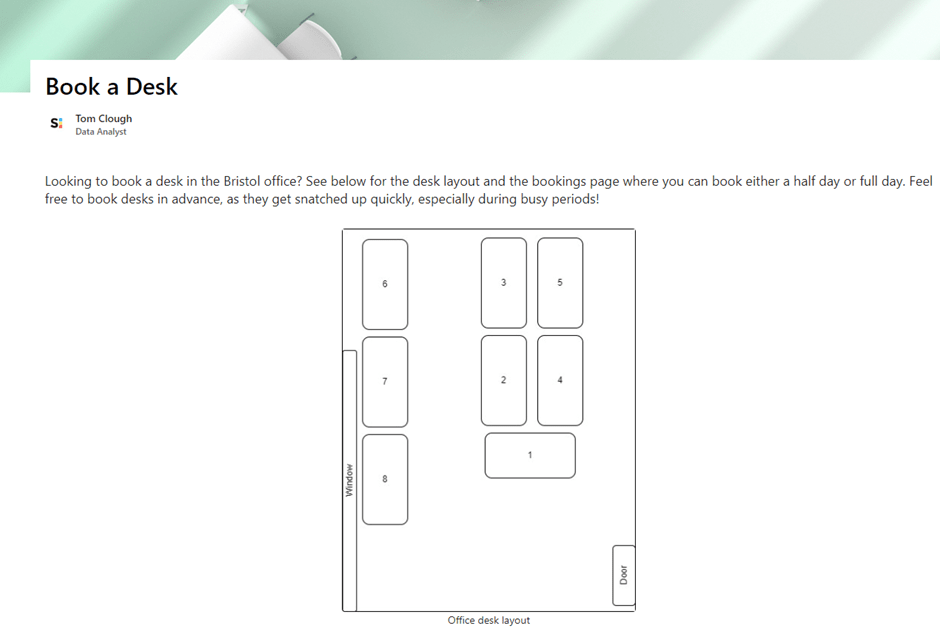
As we use the MS Bookings for a hot desk booking system at Snap, we have created a SharePoint site to hold an office desk layout diagram and then embedded the Bookings page below it. To do this, create new SharePoint page, add a blurb so users know what it is for and optionally create a diagram with the desk layout of your office.

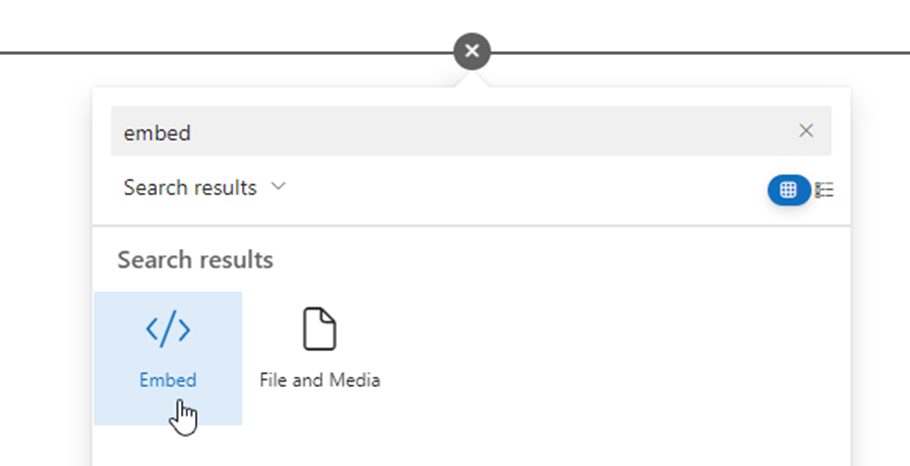
Below that, add a new section with the ‘Embed’ widget.

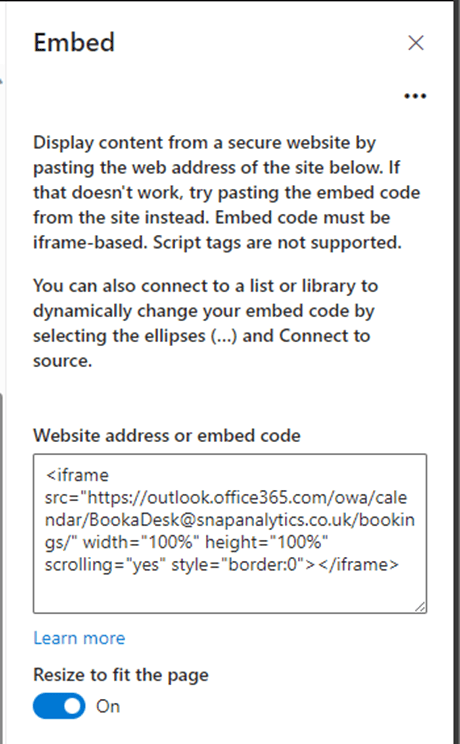
In the ‘Embed’ widget settings, paste the IFrame code we retrieved above.

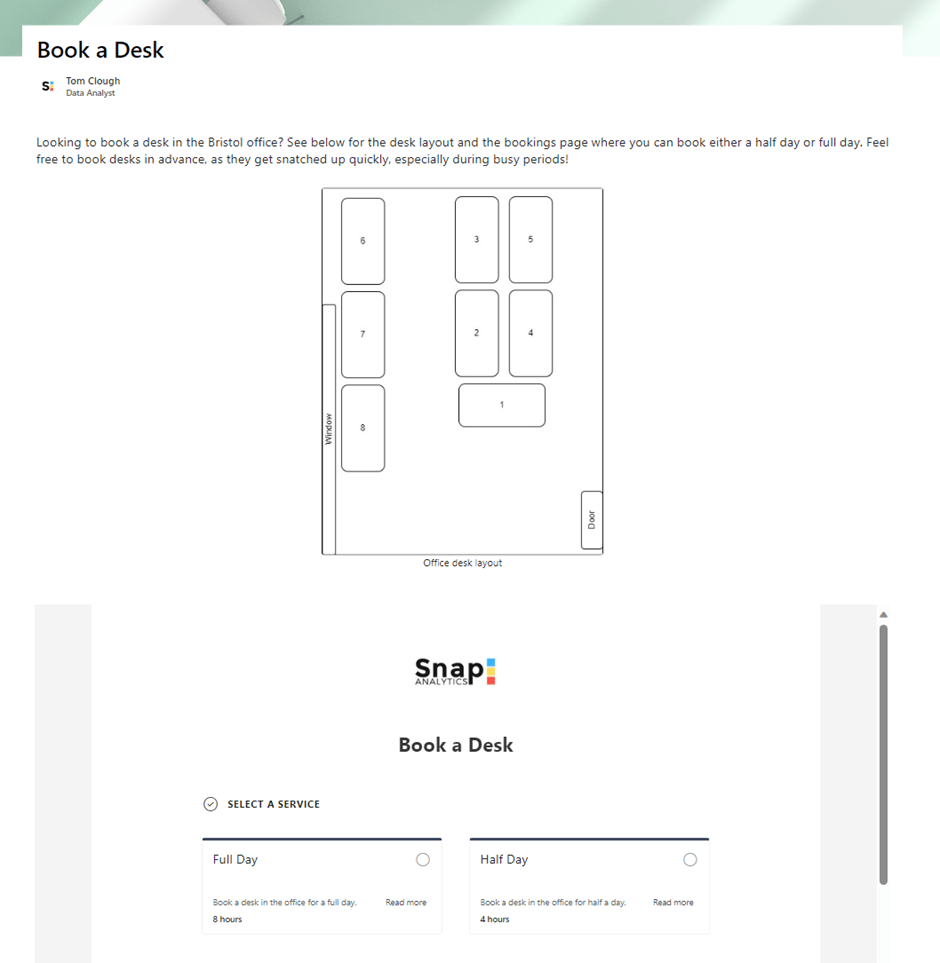
Once you republish your page, you now have one centralised page to share with users of the Bookings system.

Advanced feature #2: Extracting Bookings Data for Analytics

If you would like to build a dashboard on top of your Bookings system to analyse your bookings data, this can be achieved using the MS Bookings Power Automate connectors. If this is something you are interested in, I highly suggest setting this up before deploying the Bookings system to users because the connector is triggered by bookings and does not extract historic booking data.

There are three Power Automate MS Bookings connectors: When an appointment is created, updated or cancelled. We will create a Power Automate flow for each of these connectors so that we can capture all Bookings actions.

1. Create a new Automated cloud flow
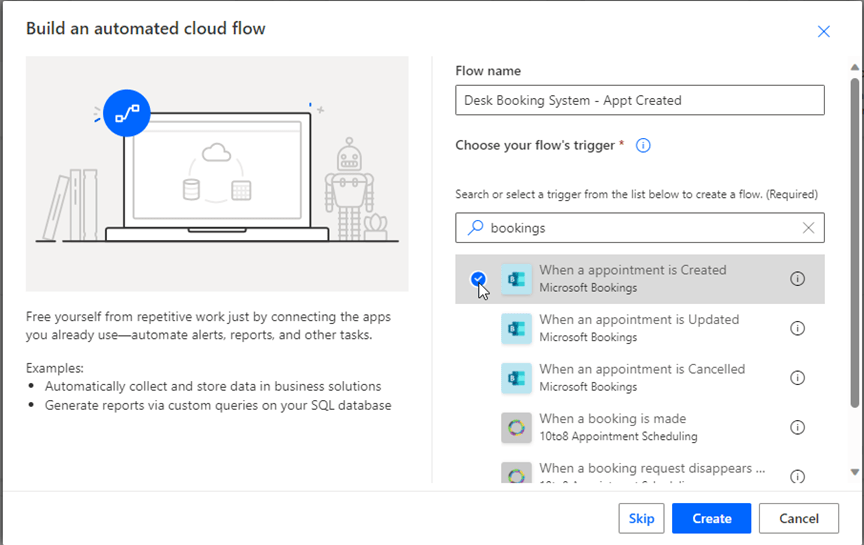
2. Name your flow and select the ‘When a appointment is Created’ trigger (hopefully they correct the grammar issue in the name!). Select ‘Create’.
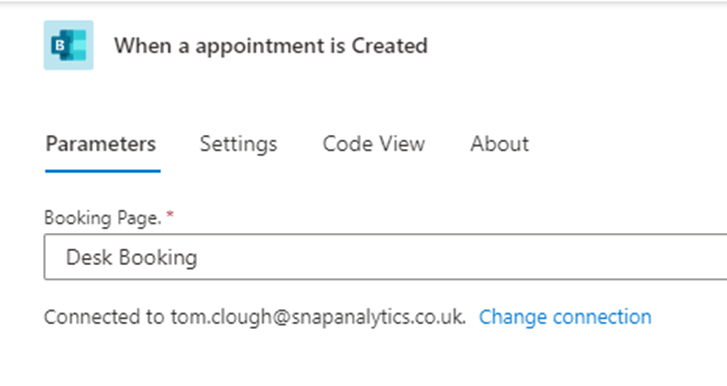
3. You will be taken to a canvas with a Booking trigger on. Click it and select your Bookings page.
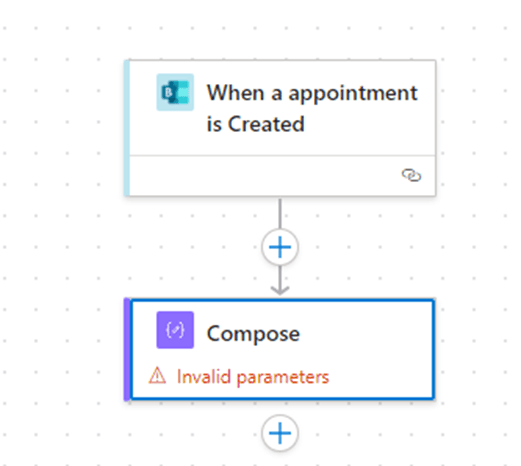
4. Add a new ‘Compose’ action flowing from the Booking Trigger.
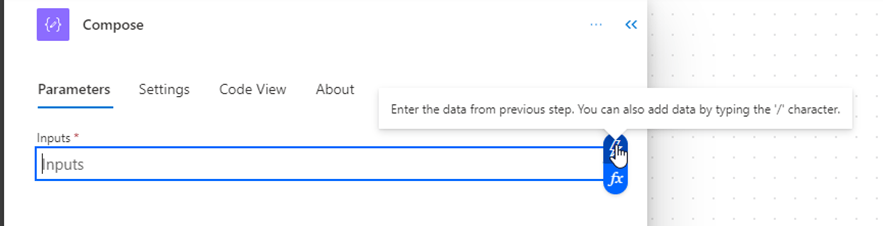
5. Select the Compose action, click the Inputs box and click the lightening icon to bring up a window to reference data from a previous step.
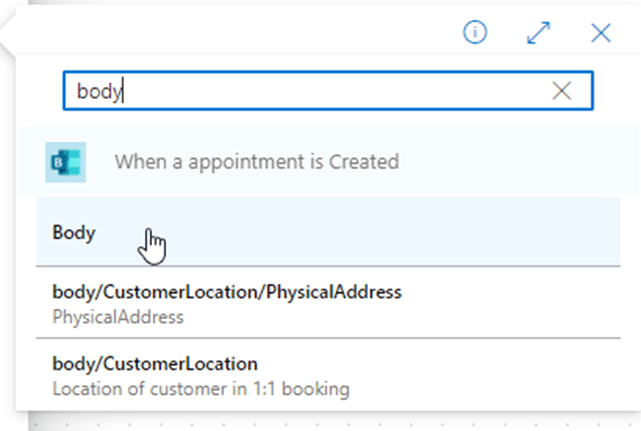
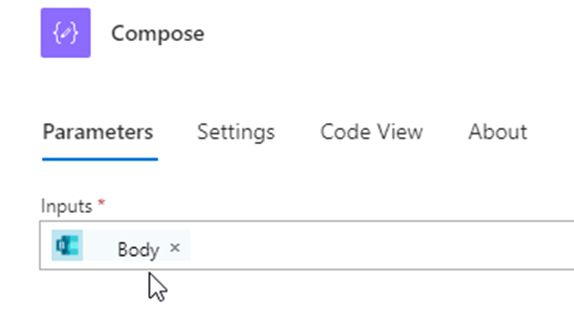
6. Search and select ‘Body’.
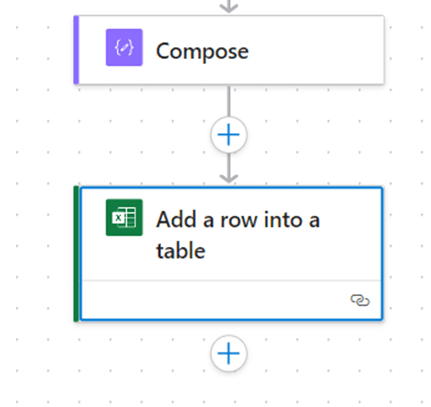
7. Add a new action to ‘Add a row into a table’.
8. Before we can configure this action, a target Excel sheet will need to be created in a OneDrive or SharePoint location

Although SharePoint is recommended as it is in a shared location. Create this somewhere where your MS account will have access as the Power Automate will use the flow creator’s credentials. In the sheet, create a table to hold the Bookings data. In our case, we are using it for hot desk bookings. If you are too, then use the column headers shown below. Otherwise, you can customise them to better represent your data. Ensure that you flag it as a table in Excel by highlighting the column headers and going to the ‘Insert’ ribbon menu and then clicking ‘Table’.

9. Now in the ‘Add row into table’ action, search for your newly created Excel sheet and link to the table.
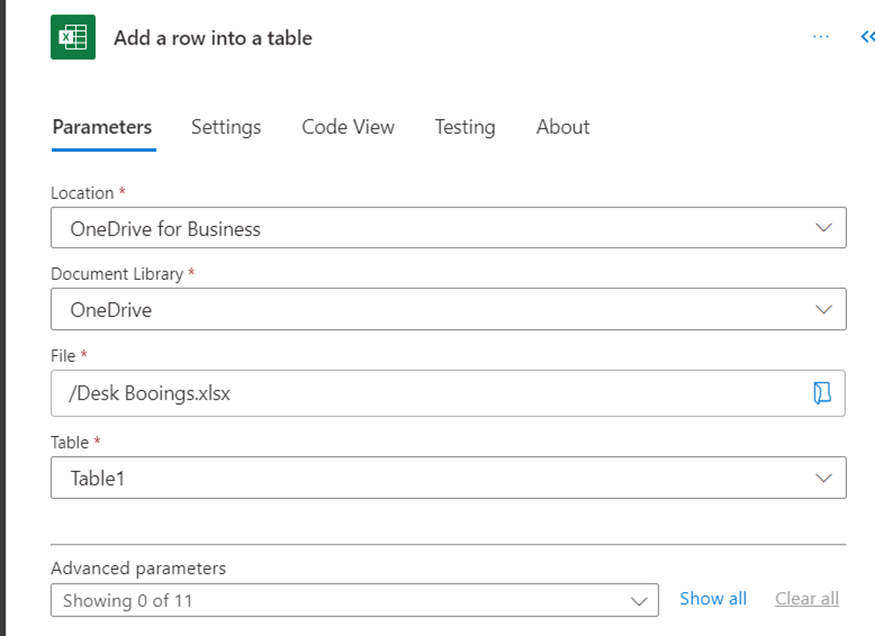
10. Click ‘Show all’ at the bottom of the ‘Parameters’ page. For each column, select the lightning bolt at the right of the field and fill in the following:
ColumnPower Automate Parameter
IDSelfServiceAppointmentId
CUSTOMER_NAMECustomerName
START_TIMESTAMP_UTCStart Time
END_TIMESTAMP_UTCEnd Time
SERVICEServiceName
DESKStaffMembers DisplayName
CUSTOMER_EMAILCustomerEmail
STATE‘Created’ (as a fixed string)
ACTION_TIMESTAMP_UTCutcNow() note: this is found in the functions list
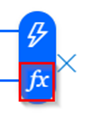
TRANSACTION_IDId

Which should come out looking like this:

11. Save the Power Automate flow

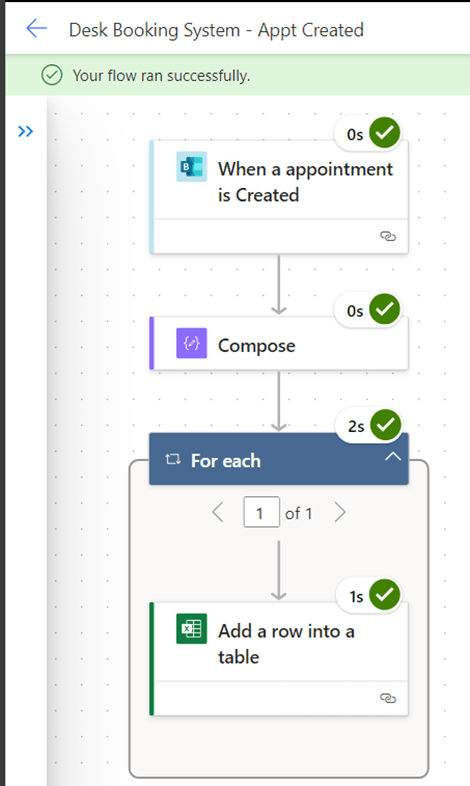
Next, we will test it to make sure it works. Click the ‘Test’ button in the top right, select ‘Manually’ and then ‘Test’. Now go and create a booking via the booking page.

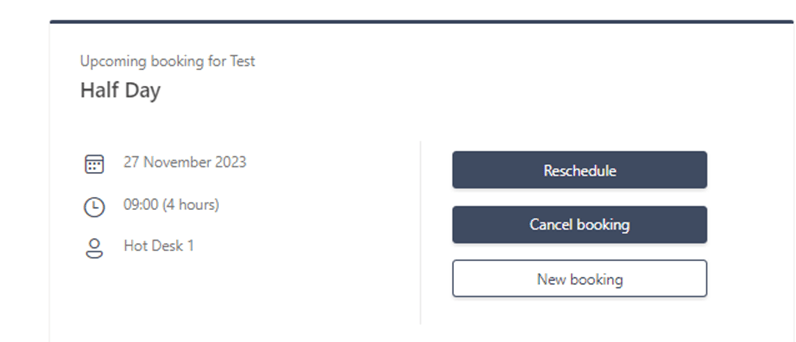
Once that is done, you should see a successful test in Power Automate:

You should also see a new row in your Excel with the details of your booking (feel free to delete any empty rows at the top of the table):

12. Lastly, repeat the above steps in two new Power Automate flows for the ‘Updated’ and ‘Cancelled’ Bookings triggers

The only difference should be the trigger, and the ‘STATE’ column string which should be set to ‘Updated’ and ‘Cancelled’ depending on the trigger. Make sure to point them to the same Excel sheet.

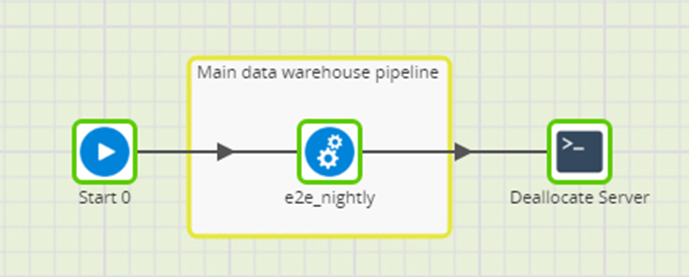
This Excel sheet can now be ingested into a Data Warehouse and reported on using a Data Visualisation tool such as Power BI. At Snap, we use Matillion to load this into our Snowflake account where we have a star schema with dimensional tables adding master data to enrich the Bookings data such as employee attributes. We then have a simple Snowflake Dashboard to visualise the data.

Final thoughts

Hopefully you found these advanced features of MS Bookings useful. We have implemented all three of these internally at Snap and have benefited greatly from using MS Bookings as a hot desk booking system, embedding it into our SharePoint site, and gathering analytics data on hot desk usage such as which days and desks are most popular. Please feel free to reach out to me on LinkedIn or drop a comment on this blog if you have any further questions.

How to Automatically Shut Down an Azure Matillion Instance After a Schedule Finishes

This blog follows on from the How to Automatically Shut Down an AWS Matillion Instance After a Schedule Finishesblog but instead provides the steps relevant for Azure rather than AWS.
I would strongly recommend reading the introduction and The “Death Loop” Issue sections in that blog before proceeding with the below steps. Fortunately, configuring this for Azure is simpler than AWS due to Azure giving instances managed identities by default. Unlike Azure, AWS requires the instance be granted a custom role with a policy to allow it to turn itself off.

Step 1: Installing the Azure CLI

The Azure CLI is a powerful tool for interacting with the Azure Cloud Platform in various ways. Here, we will use a simple CLI command to deallocate an Azure VM.  To begin, you will need to install the Azure CLI on the Matillion VM, which can be done by following this installation guide by Microsoft.

Step 2: Creating a Deallocate Bash Script

Create a file with the below script in the following directory:

 /home/custom_scripts/deallocate_server

by SSHing into the VM and ensure that the centos user owns the file.

sleep 30
az login --identity
az vm deallocate --resource-group <MY_RESOURCE_GROUP> --name <MY_VM_NAME>

The first command sleeps for 30 seconds to ensure that the Matillion schedule has enough time to complete safely before the VM is deallocated. The second command authenticates with the Azure CLI with the VM’s managed identity. The final command executes the VM deallocation using the Azure CLI.

A couple of things to note:

  • If you have a separate production Matillion instance, the above steps will need to be redone on that instance, and the new resource group and VM name will need to be used in the deallocate_server script.
  • The VM’s Enterprise Application in Azure will need at least the ‘Desktop Virtualization Power On Off Contributor’ role on the VM. Usually, the VM will already have sufficient privileges for this.

Step 3: Implementing in Matillion

From here, we will use a Bash Script component to execute the above deallocate_server script. A wrapper job will be needed around your main pipeline where you can attach a Bash Script component to the end of the pipeline (this wrapper job will be the one run by your Matillion schedule). Important: the flow from the main pipeline (in this case e2e_nightly) will need to be unconditional (grey) so that the server is turned off regardless of whether the pipeline was successful. Otherwise, your VM will stay on in the event of a pipeline failure if the Bash Script is only set to execute when the main pipeline is successful (unless you have perfect pipelines… 🤔).

Within the Bash Script, place the below command which will execute the deallocate_server script that we created on the VM in step 2.

sh /home/custom_scripts/deallocate_server >/tmp/deallocate_server.log &

Crucially, the ampersand symbol (&) at the end of the command enables the command to be executed without waiting for the script to finish. This allows the Bash Script component to immediately flag as completed in the eyes of the Matillion task scheduler, and therefore the schedule will be marked as complete. This avoids the aforementioned “death loop” as there is no dependency on the deallocation commands completing before the Matillion schedule can finish. Additionally, the script exports the output of the deallocate command to a log file for auditing purposes.

Final thoughts

The solution proposed in this blog uses the Azure CLI to deallocate your Matillion VM by simply running a Bash Script component. It should be noted that there are a number of alternative ways to achieve this, such as using message queues to trigger a cloud function to shut down the VM, which is equally valid.

Once you have this deallocation functionality configured, you can rest assured that your Matillion VM will dynamically shut down once your schedule completes. Please feel free to reach out to me on LinkedIn or drop a comment on this blog if you have any further questions.

How to Automatically Shut Down an AWS Matillion Instance After a Schedule Finishes

Matillion customers, in their effort to optimise credit consumption, are eager to reduce unnecessary costs by minimizing the uptime of their instances. One particularly tricky aspect of this optimisation is managing instance shutdown after a routine schedule has completed, be it a successful or failed run. Unfortunately, Matillion doesn’t offer an inherent feature to automatically switch off instances as part of a pipeline. Furthermore, the execution duration of these schedules can vary due to factors like data volumes and the day of the week, making it impractical to implement a fixed-time shutdown. Consequently, a flexible alternative solution is required. The configuration process for enabling this functionality is slightly different between AWS and Azure.

This blog will cover the steps for AWS; the steps for Azure can be found here

The “Death Loop” issue discussed below is relevant to any instance: AWS, Azure or other.

The “Dead Loop” Issue

Before delving into the steps for enabling this functionality, it is crucial to address an issue concerning VM deallocation during a running job. Consider this scenario: your nightly schedule is running, all jobs complete (regardless of success or failure), and you want the last component in your pipeline to deallocate the VM (we’ll cover how to create a deallocate component in the following sections). Matillion will expect the deallocation component to return a success or failure response, like any other component, before it can mark the running task as complete. But, the deallocation component will never be seen to complete by the Matillion task manager due to the server deallocating in that instant. Consequently, when the VM is switched back on, the task scheduler detects the job didn’t fully complete and automatically resumes the job from where it left off, which was at the “Deallocate Server” component. As a result, this will enter the VM into what I like to call a “death loop” where the VM repeatedly switches itself off every time it’s turned on. Breaking this loop is challenging, but this approach avoids this problem by decoupling the deallocation from the scheduled job. The key to the solution is to do the deallocation by calling a bash script for deallocation instead of putting the deallocation command in an embedded bash script in Matillion. Below are the steps to achieve this.

Step 1: Assigning a Role to the Instance

Firstly, an AWS role withs the ability to turn off the instance needs to be created and given to the Matillion EC2 instance.

  1. Create a policy in AWS via IAM by selecting ‘Create policy’ in the Policies page.
  2. Select ‘EC2’ as the Service.
  3. Search for and select the ‘StopInstances’ Action.
  4. We will want to restrict this to only work for the specific Matillion instance so select ‘Add ARNs’. In the pop-up choose the appropriate account radio box and enter the resource’s region and ID.
    We will want to restrict this to only work for the specific Matillion instance so select ‘Add ARNs’. In the pop-up choose the appropriate account radio box and enter the resource’s region and ID.

  5. Feel free to add request conditions such as the requester’s IP address being the Matillion IP. Click ‘Next’.
  6. Provide a Policy name, then create the policy.
  7. Next, we need to create a role to assign the policy to. Select ‘Create role’ in the Roles page.
  8. Select the ‘AWS service’ Trusted entity type and ‘EC2’ as the Use case. Click ‘Next’.
  9. Search for and select the Policy created in the previous steps. In my case, this is ‘EC2StopInstancePolicy’. Click ‘Next’.
  10. Provide a Role name, then create the role.
  11. Lastly, we need to assign the newly created role to the Matillion EC2 instance. Head to the EC2 Dashboard, and then to the Instances page.
  12. Select the Matillion instance, in the top right click ‘Actions’ > ‘Security’ > ‘Modify IAM role’.
  13. Select the Role created in the previous steps and click ‘Update IAM role’.

Step 2: Installing the AWS CLI

The AWS CLI is a powerful tool for interacting with the AWS Cloud Platform in various ways. Here, we will use a simple CLI command to deallocate an EC2 instance. You will need to install the AWS CLI on the Matillion VM, which can be done by following this installation guide.

Step 3: Creating a Deallocate Bash Script

Create a file with the below script in the following directory:

/home/custom_scripts/deallocate_server

by SSHing into the VM and ensure that the centos user owns the file.

sleep 30
aws ec2 stop-instances --instance <Your Instance ID>

The first command sleeps for 30 seconds to ensure that the Matillion schedule has enough time to complete safely before the VM is deallocated. The second command executes the VM deallocation using the AWS CLI. It is worth mentioning that if you have a separate production Matillion instance in a different AWS account, the above steps will need to be redone in that account, and the new instance ID will need to be used in the deallocate_server script.

Step 4: Implementing in Matillion

From here, we will use a Bash Script component to execute the above deallocate_server script. A wrapper job will be needed around your main pipeline where you can attach a Bash Script component to the end of the pipeline (this wrapper job will be the one run by your Matillion schedule). Important: the flow from the main pipeline (in this case e2e_nightly) will need to be unconditional (grey) so that the server is turned off regardless of whether the pipeline was successful. Otherwise, your VM will stay on in the event of a pipeline failure if the Bash Script is only set to execute when the main pipeline is successful (unless you have perfect pipelines… 🤔).

Within the Bash Script, place the below command which will execute the deallocate_server script that we created on the VM in step 2.

sh /home/custom_scripts/deallocate_server >/tmp/deallocate_server.log &

Crucially, the ampersand symbol (&) at the end of the command enables the command to be executed without waiting for the script to finish. This allows the Bash Script component to immediately flag as completed in the eyes of the Matillion task scheduler, and therefore the schedule will be marked as complete. This avoids the aforementioned “death loop” as there is no dependency on the deallocation commands completing before the Matillion schedule can finish. Additionally, the script exports the output of the deallocate command to a log file for auditing purposes.

Final thoughts

The solution proposed in this blog uses the AWS CLI to deallocate your Matillion VM by simply running a Bash Script component. It should be noted that there are a number of alternative ways to achieve this, such as using message queues to trigger a cloud function to shut down the VM, which is equally valid.

Once you have this deallocation functionality configured, you can rest assured that your Matillion VM will dynamically shut down once your schedule completes. Please feel free to reach out to me on LinkedIn or drop a comment on this blog if you have any further questions.